
Previously I shared a Quick Tutorial on using PowerPoint to create animated video footage with voiceover narration earlier, here. This Quick Tutorial is on Windows MovieMaker.
Basically, this Quick Tutorial series for newbie YouTubers like me demonstrates how to make video content on a shoestring budget, or no budget at all. The premise is to be as low-tech as possible, using what you probably have on hand already. It’s all about being smarter with what you have.
Before reading further, can we both acknowledge that I am not an expert, not sufficiently experienced or skilled to the level where I should be giving anybody advice, and have literally only been doing this for about a year. On the other hand, to make a case for myself, I think this makes the Quick Tutorial series all the more endearing. It’s me saying to you, hey look, I don’t know what the heck I’m doing but I still manage to get stuff up and running, so you can, too.
Note: MovieMaker was discontinued effective 2017 and replaced with something called Windows Story Remix. Since my computer and my set video-making ways pre-date 2017, I’m going to proceed with MovieMaker. Assuming at some point in the future I upgrade to Windows Story Remix, I’ll make a Quick Tutorial for that then.

The first thing I do is set up my laptop on a stack of books to get the angle and positioning just right. (I’ll get into how to angle and position your camera lens in the subsequent post.) The laptop came with a video camera recording program, so that’s what I use. I click the red record button, and then just go.
I like to use jump cuts (also explained in subsequent post) so that it’s easier for the final video product to look like I stay on point the whole time and don’t wander off on irrelevant tangents or have you all sit there watching me think, on camera, about what next thing I want to say.
Using jump cuts means I’ll hit record, then give one talking point, or ramble on about just one point I want to make about the topic. Then I hit stop record and that’s the end of one video clip. Then I think about my next talking point, hit record, talk, then stop. And on and on until each talking point is one video clip.
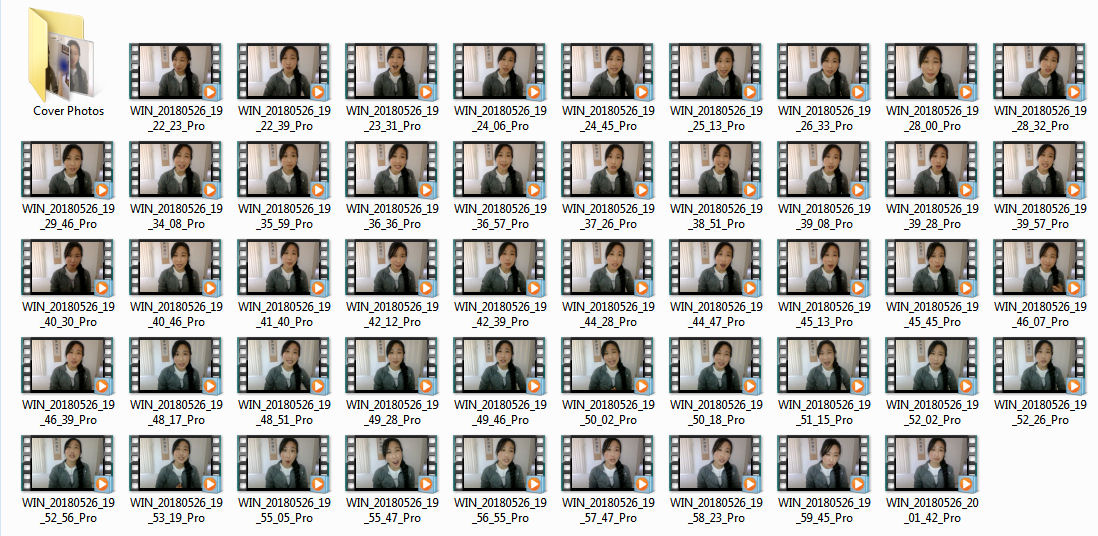
When you’re done, you’ll get a file folder that looks something like the above. By the way, as soon as I hit the red record button, I silently count to 5 seconds, then begin talking. And after I’m done talking, silently count 5 seconds before hitting stop record. The head and tail pause will come in useful later during the editing phase.
Above you’ll also see the file folder “Cover Photos.” While I’m at it, I’ll also take a couple of selfie photos with the laptop camera to later use as the cover image of the YouTube video.

To give an example, above are the few cover image options I took for myself. I always take several so I have options.
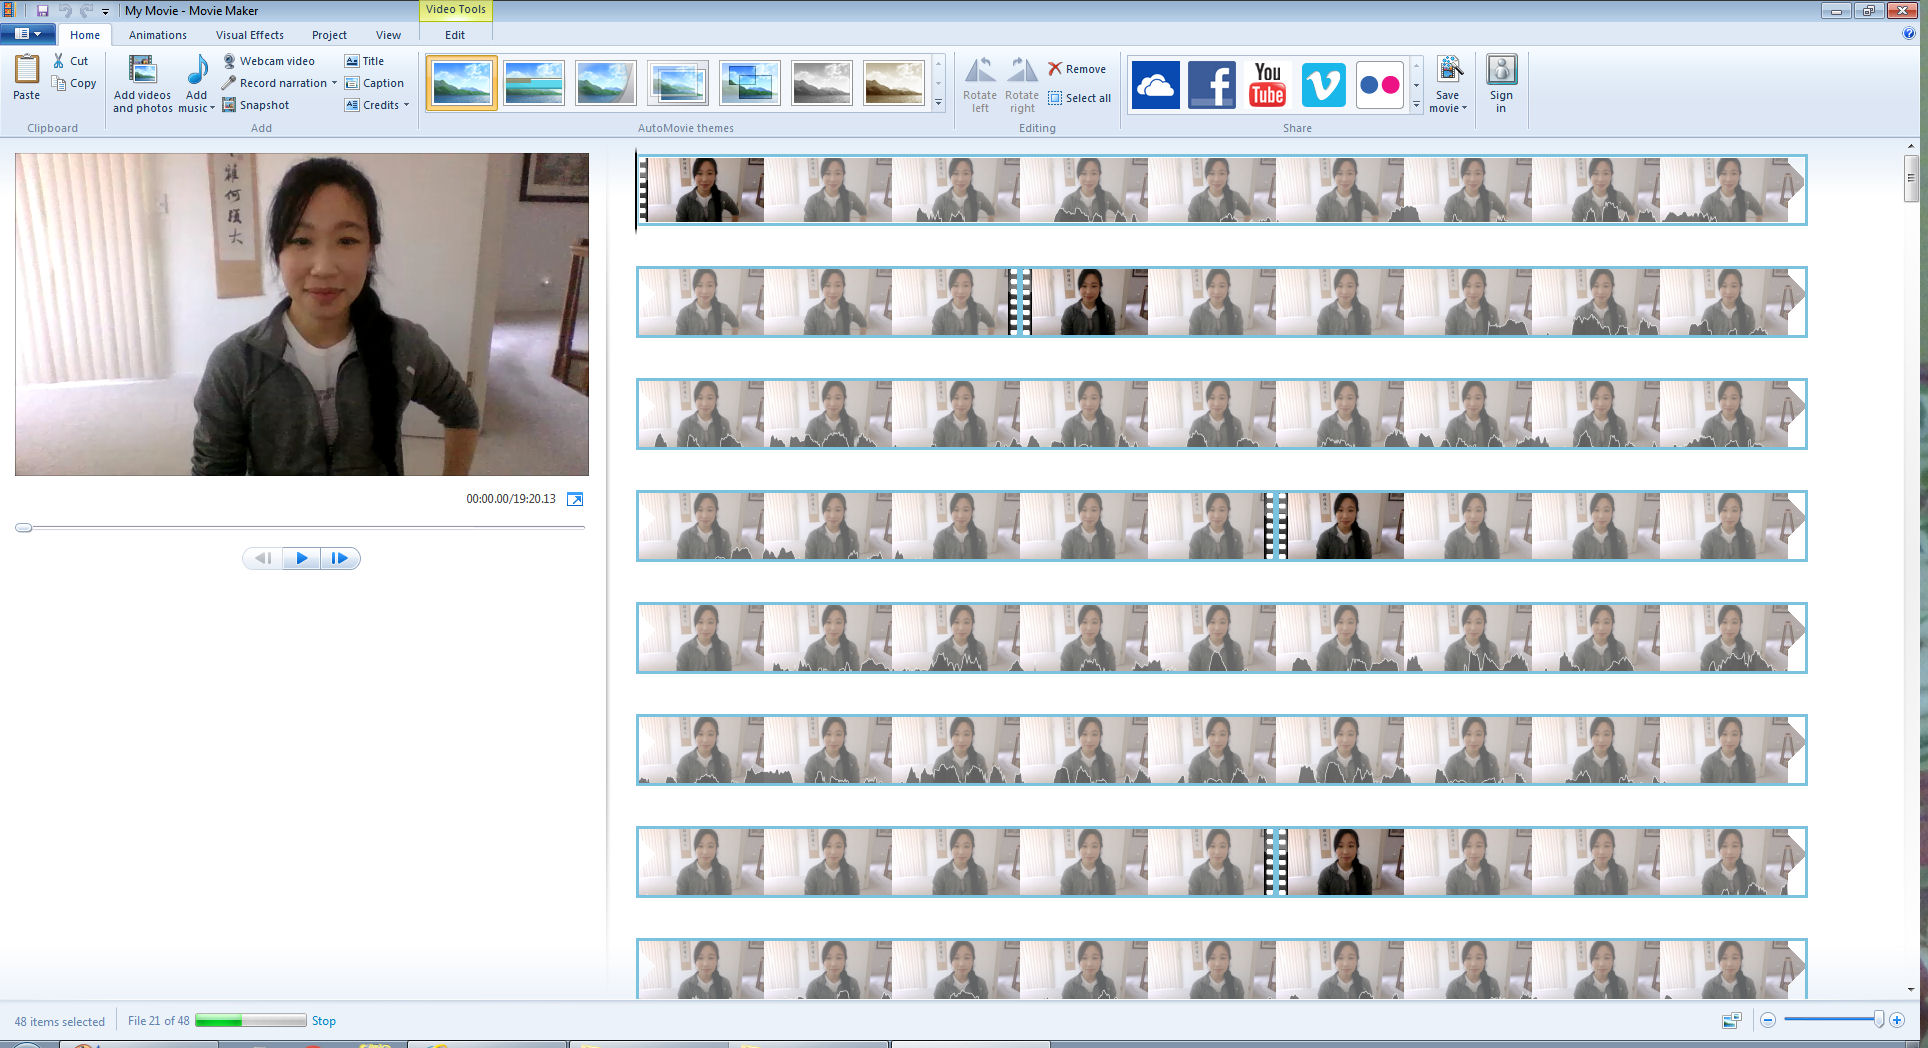
Now open MovieMaker and then drag and drop all the video clips you took in order. If you’ve got a bunch of video clips like I have, it may take a couple minutes to load, so be patient.
When it’s done loading (meaning that green loading bar you see in the bottom left corner above is gone), I select all files (Ctrl+A).
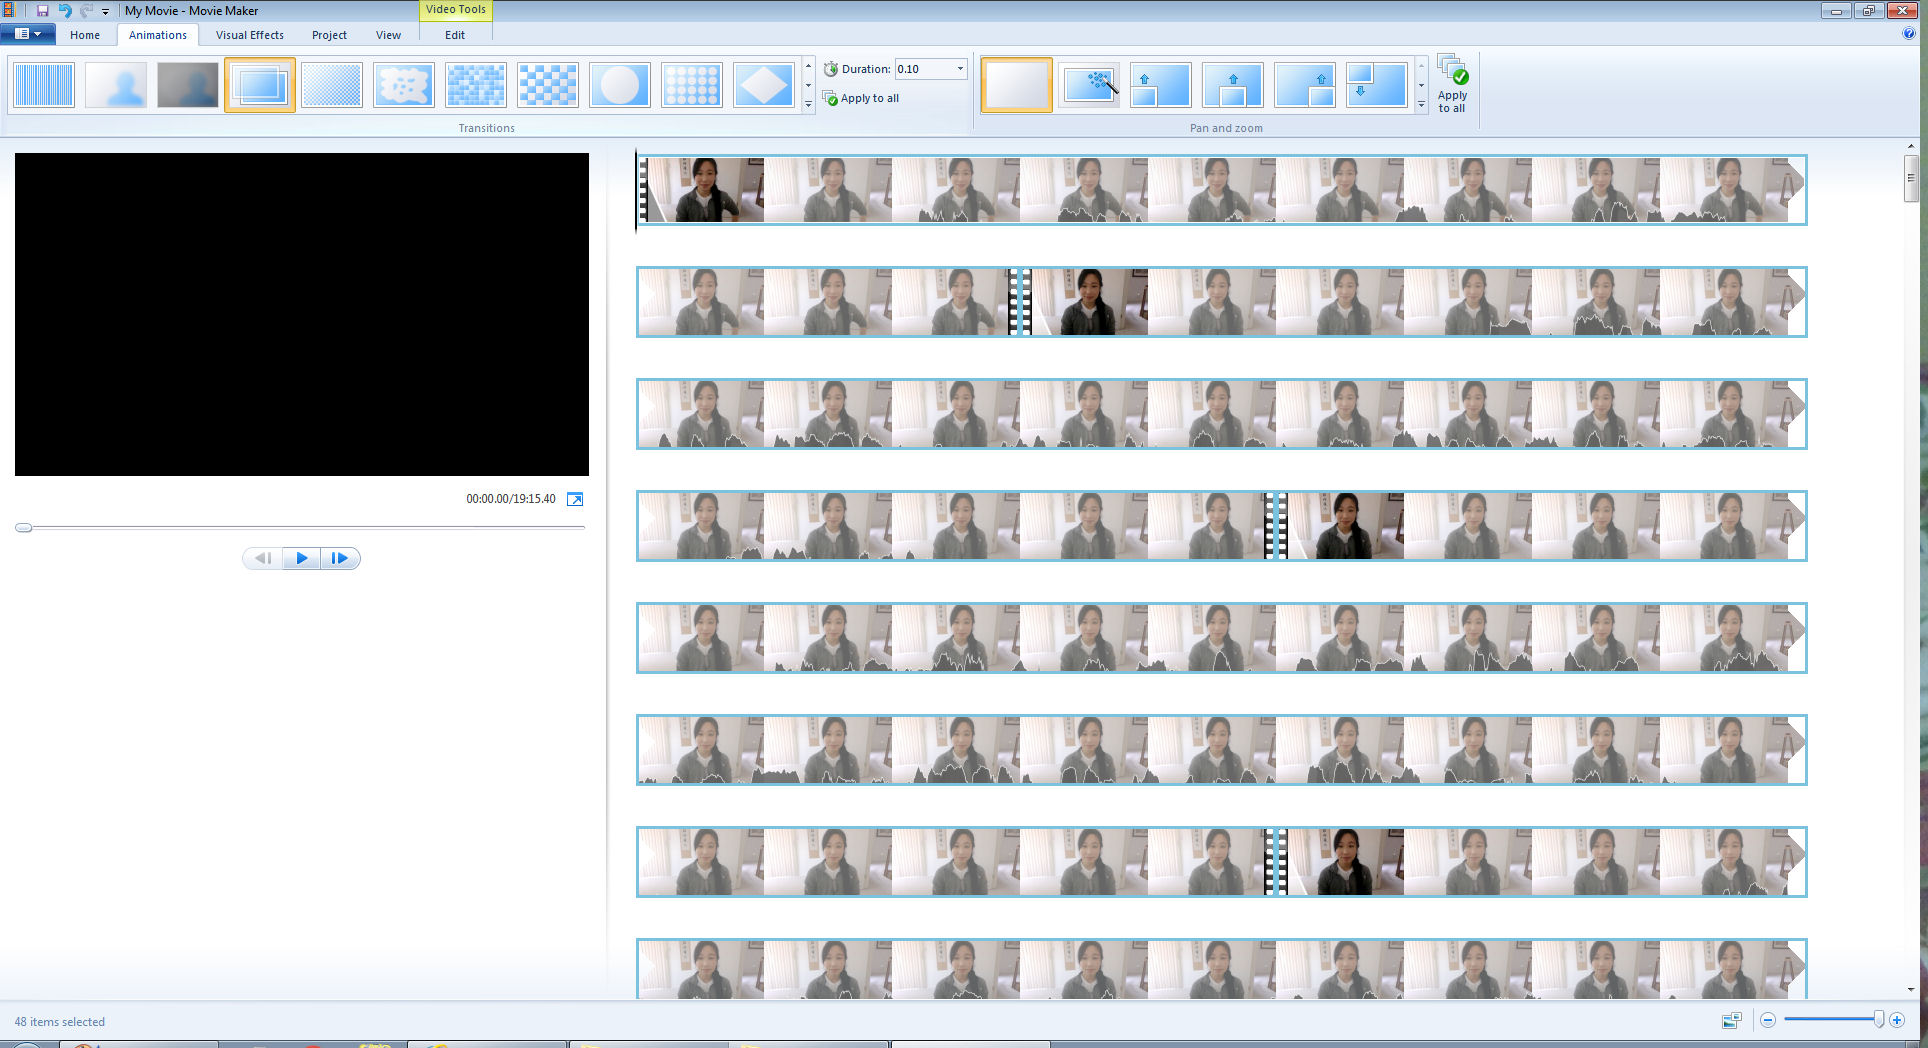
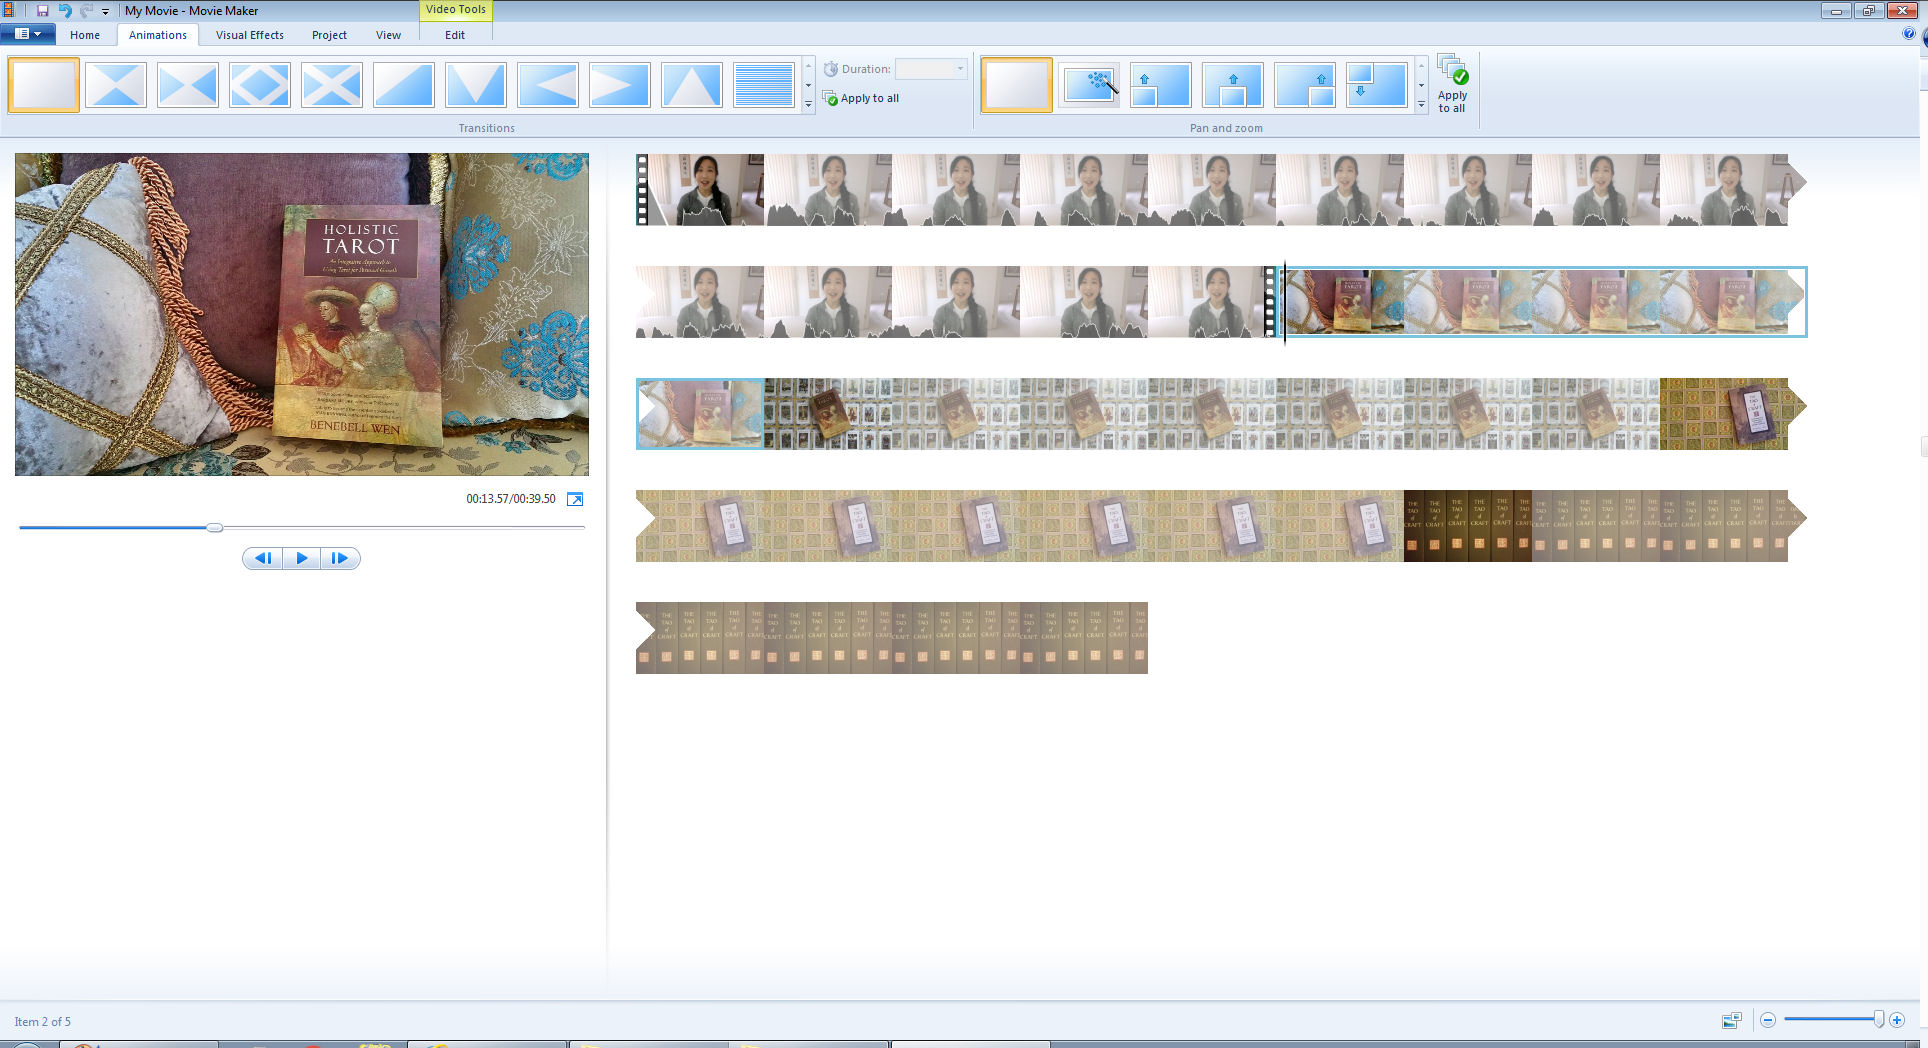
Then click on the “Animation” tab up top, among the animation options, choose the one as selected in the above screen shot. (Obviously, you don’t have to do this. Choose any of those animation options. Duh. I’m just showing you what I do and my go-to option.) It’s the one called “Crossfade.”
Then go to that option “Duration” and manually change 1.50 seconds to 0.10 seconds. Again, obviously optional. This is just what I’ve found works after an exhausting ridiculous amount of time tinkering. So go ahead and reinvent the wheel. Or just go straight for the 0.10 seconds.
Note: If you’re using the Crossfade transition between video files that are from PowerPoint and with voiceover narration, or between image files, keep to 1.50 seconds for the duration. If using talking head video files, use 0.10 seconds. I am not smart enough to explain why. Based on personal experience, these are just the conclusions I’ve reached for myself.
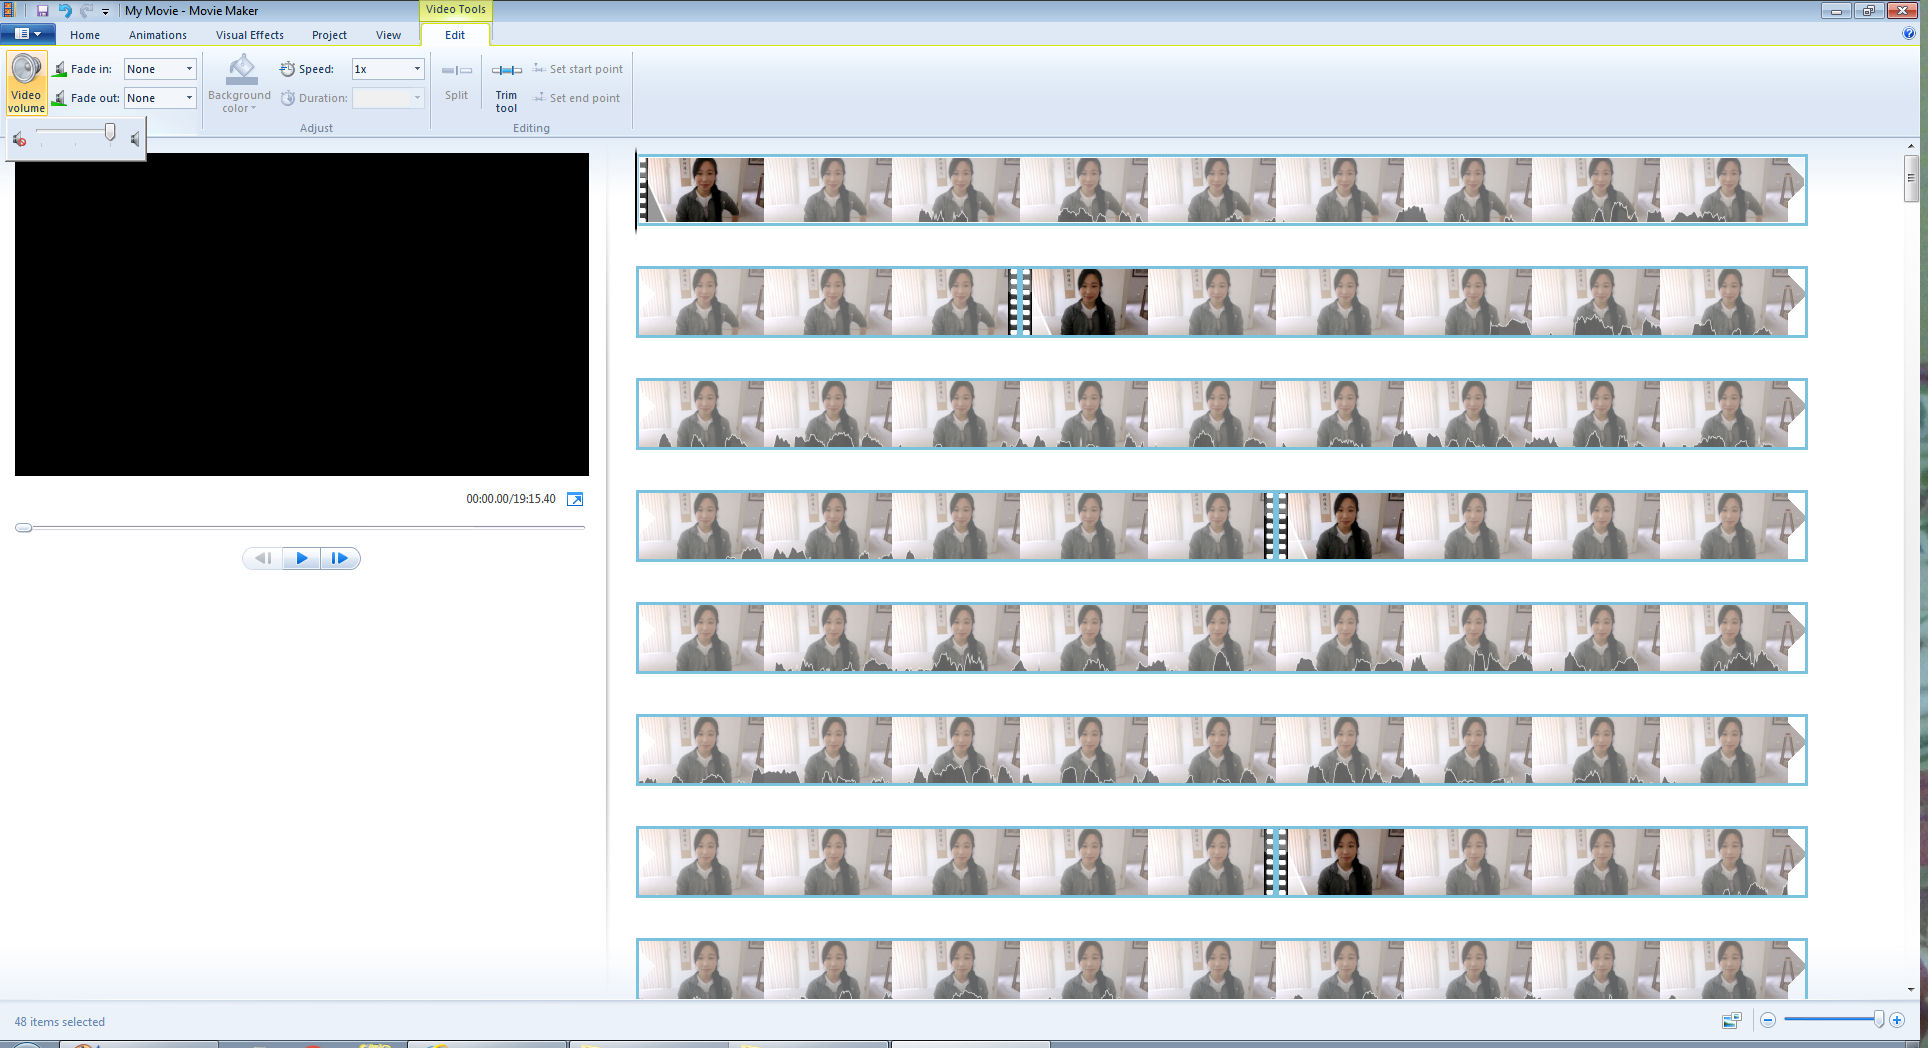
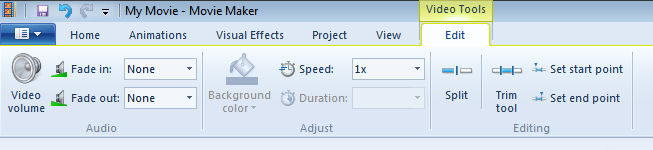
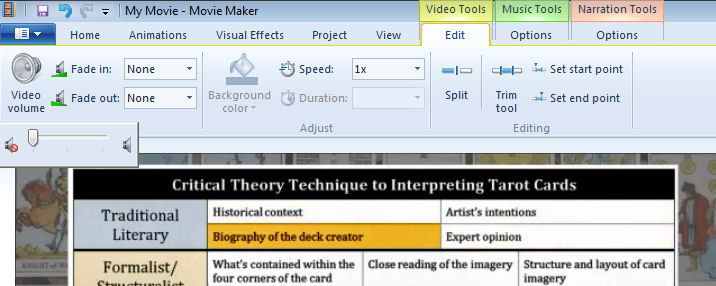
Next, with all video files still selected, go to the “Edit” tab up top under “Video Tools.” Click on that volume icon at the way left and crank it up to maximum. Tinker to see if you need to do this. I’m using shitty audio equipment from 2014, so I need to do this. It helps just a smidge with improving sound quality.

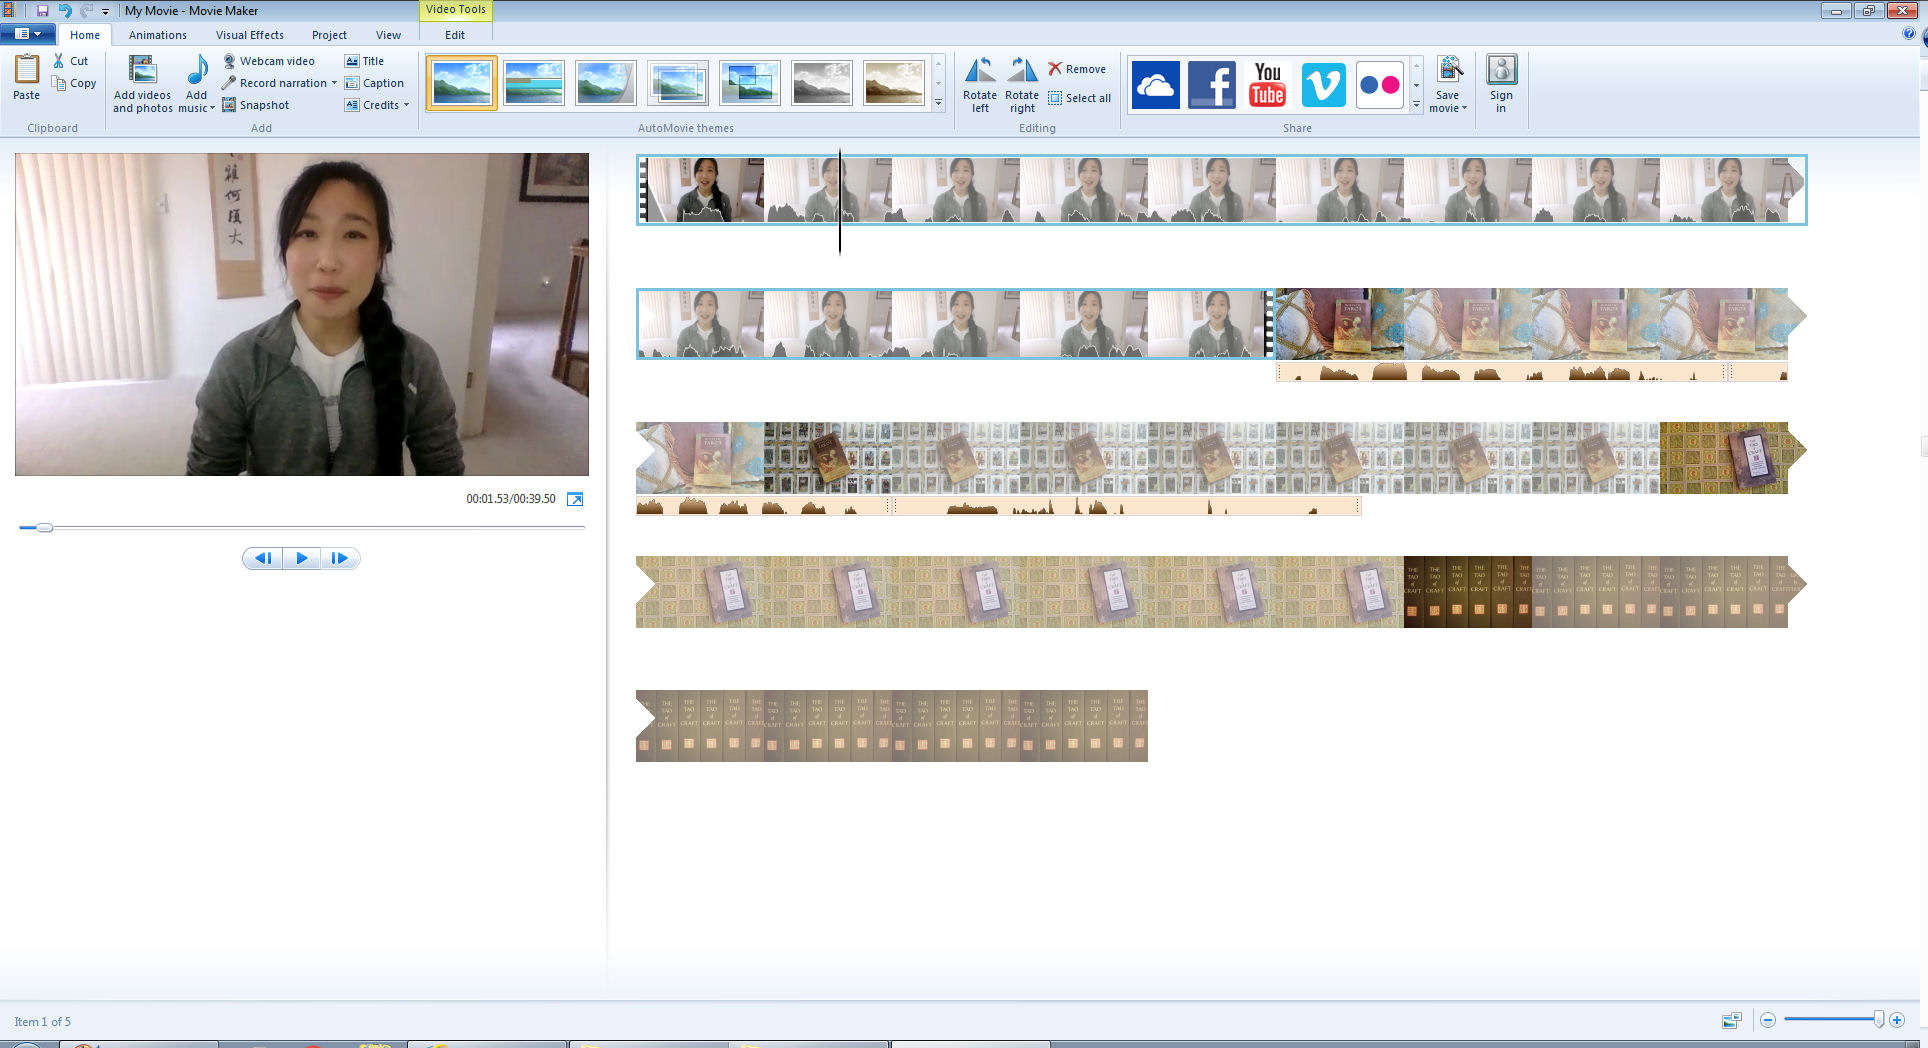
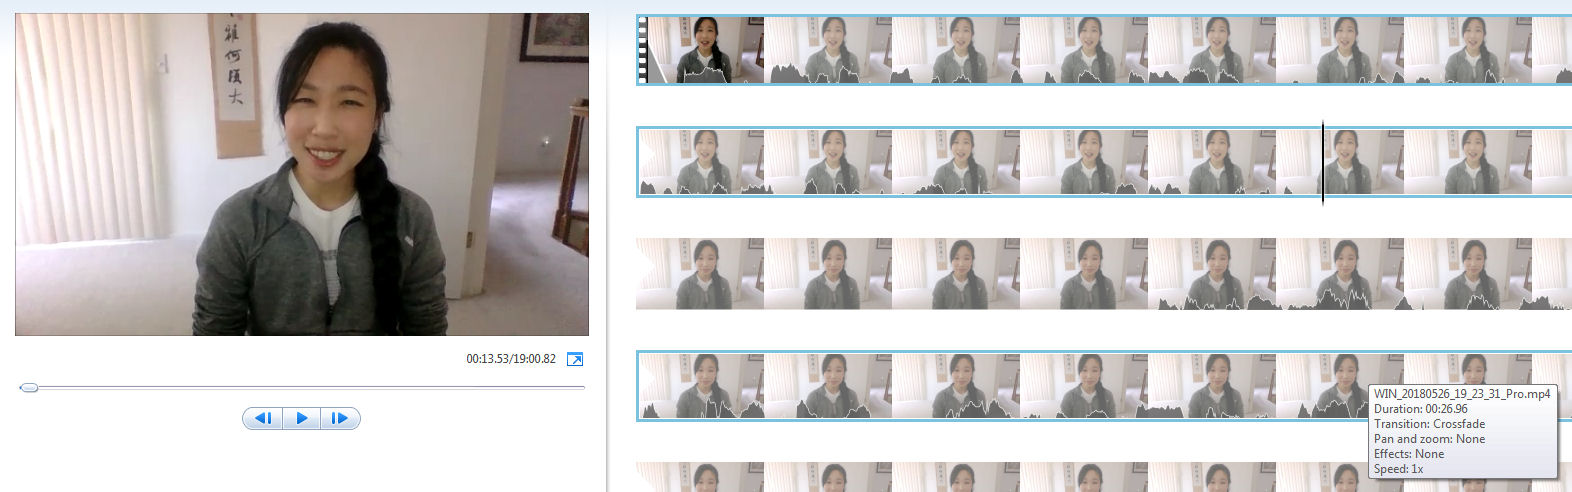
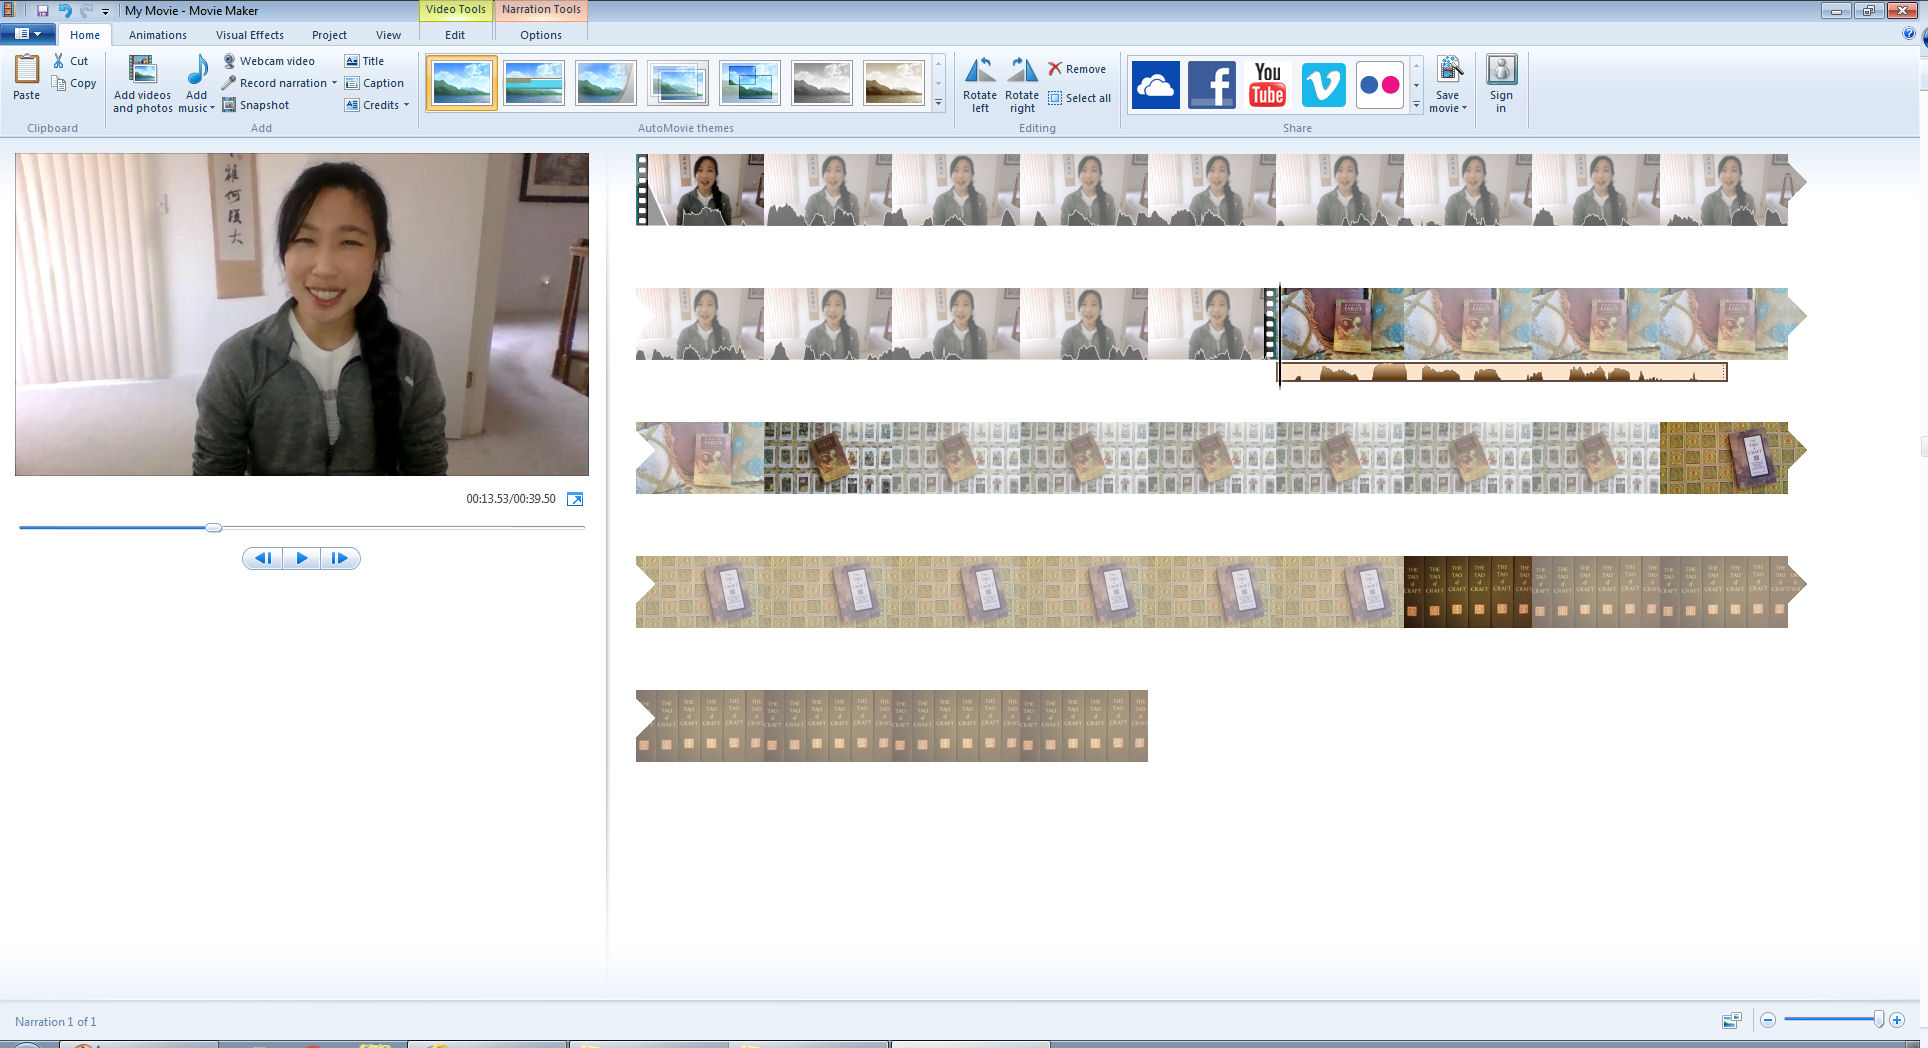
Now click anywhere to un-select all the video files. They won’t be highlighted with the blue border anymore. That’s how you know you’ve un-selected them. In the above screen shot, you’ll see that there’s a black vertical line along that first row of what looks like film footage. I’ve moved that bar close to the shaded wavy lines along the bottom edge of the film footage.
Those wavy lines indicate sound. You want to move the black bar close to where the audio actually starts and cut out all the silent-counting-to-five part I talked about earlier. See, if you don’t record the silent counting part before and after each talking clip, when you go to edit, sentences can get cut out and there’s no practicable way to salvage. By leaving ample silence, you do a cleaner job with your jump cuts.
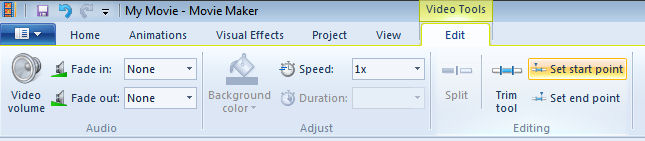
Once you’ve positioned the black vertical bar where you want the video clip to start (and all preceding part cut out), go up top, click the “Edit” tab, then select “Set start point.” You’ll see it highlighted in the image above.
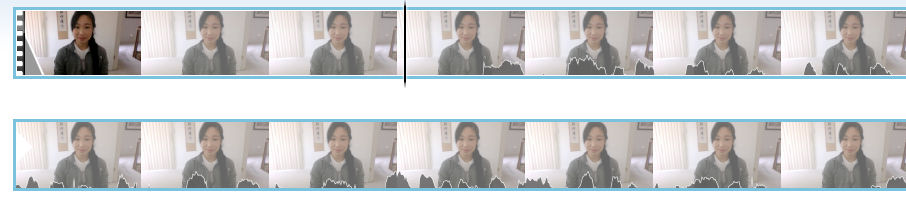
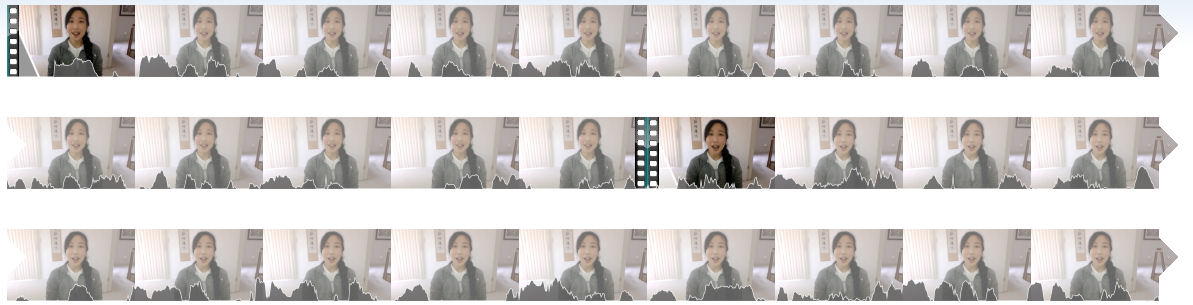
Above is a close-up of what the original video clip looked like before you cut.
Now this is what it looks like after you’ve hit “Set start point.”
Play the video clip to make sure you’ve cut where you want to cut and you haven’t compromised audio. Also check timing with the pauses and make sure there isn’t too much lag time before the talking starts. You also don’t want to cut too close to the talking either. It’s a balancing act.
Now use your mouse to drag the black vertical bar to the end of that video clip, right after the shaded wavy lines end. Again, leave just enough silence (like a millisecond) so that the transition between this clip and the next will be seamless. If you cut too close to the audio, you’ll cut yourself off mid-sentence because of the way the animated transitions work.
Once you know where you want to end that video clip, go back up top, click the “Edit” tab, and this time, click on “Set end point.”

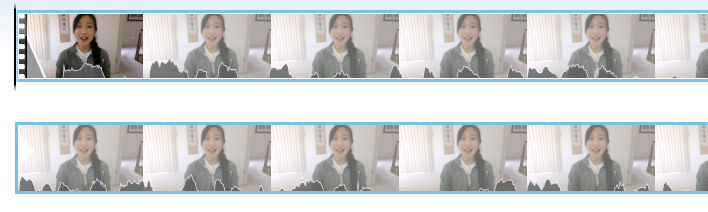
The above screen shot shows you what the first video clip should look like. Note the fragment of the second video clip after it and how there are no shaded wavy lines yet. That’s because that part of the clip shown is all silence (the quiet counting part). Meanwhile, now the edited first clip pretty much has shaded wavy lines right from the start and right to the end.
Repeat as instructed with all subsequent video clips. Be sure to play and test each transition, or jump cut, to make sure no audio gets cut out and there isn’t too much silence in between. You want it as seamless as possible. Just so you know, I’m still on the learning curve here. My jump cuts aren’t great. But at least I’m cutting out all the extraneous rambling and keeping my video chats focused.
Speaking of focus, while I’m editing here, sometimes I find a clip of something I’m talking about really isn’t what I want to end up sharing, so I just cut it out entirely. That’s another good reason to record by talking point and do jump cuts. It gives me this easy freedom to cut liberally post-recording.
Oh by the way, forgot to mention but hopefully you’re not an idiot (like me…I’ve definitely done this before where I forgot to save, the program crashes, and I’m back to square one) and by now you’ve saved your project. Yeah. Save your project. If your computer is an old piece of junk, this editing thing can crash your system and everything shuts down. (True story. Has happened to me multiple times.) This is when you’re glad you saved your work and you can pick up where you left off. If you haven’t saved your MovieMaker project… well then.

Oh, before I wrap up, a couple more tricks I learned in MovieMaker. You can do a fade-out at the end of a video clip or insert other fun visual effects with a couple default options the program comes with. Select the video file you want to add the visual effect to. It’ll be bordered with blue. That’s how you know you’ve selected it. Click the “Visual Effects” tab, and select the one you want.
Now let’s say you want to string in a bunch of photographs and then do voiceover narration in your video. Insert or drag and drop in the image files as you see below.
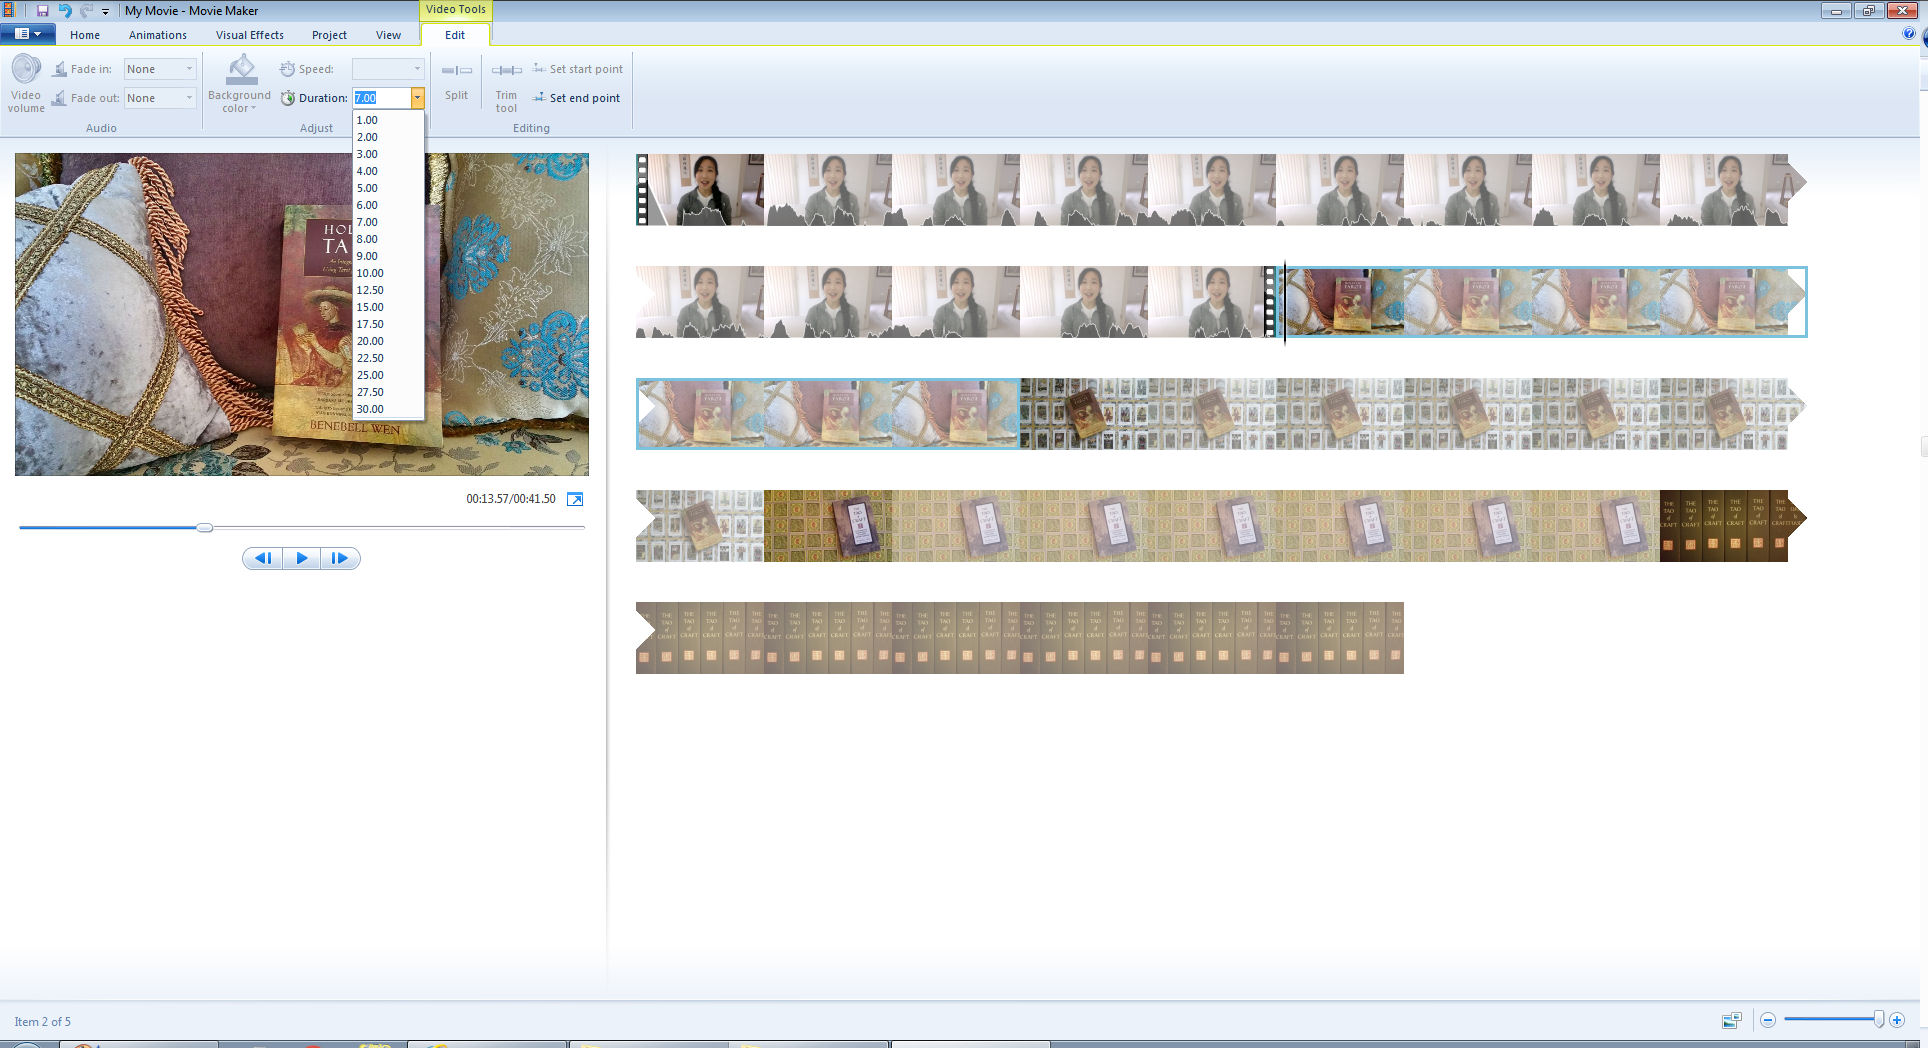
Click on the “Edit” tab and then go to “Duration” to adjust how many seconds you want each image file to be on screen. A trick I learned is if it’s not a talking head and you’re using still images with voiceover, you lose people’s attention spans after about 10 seconds, so you don’t want anything to remain absolutely static on your screen for more than 10 seconds. Tell yourself that about 10 seconds of absolute static photo imagery is all you will give yourself during voiceover. If your talking goes for longer than 10 seconds (which I assume it will), you need to insert several different photos or add animation to keep something in-motion on-screen.
Go to the “Animation” tab. With video clips, you only had the animation options available to you along that left section up top. With image clips, you get two different options. The left panel of animation options is the transition that opens into your image file. The right panel of options is kinda cool. It animates your image file a bit so it kind of mimics the effect of a video camera panning around that setting. You’ll see what I mean when you test it out for yourself.
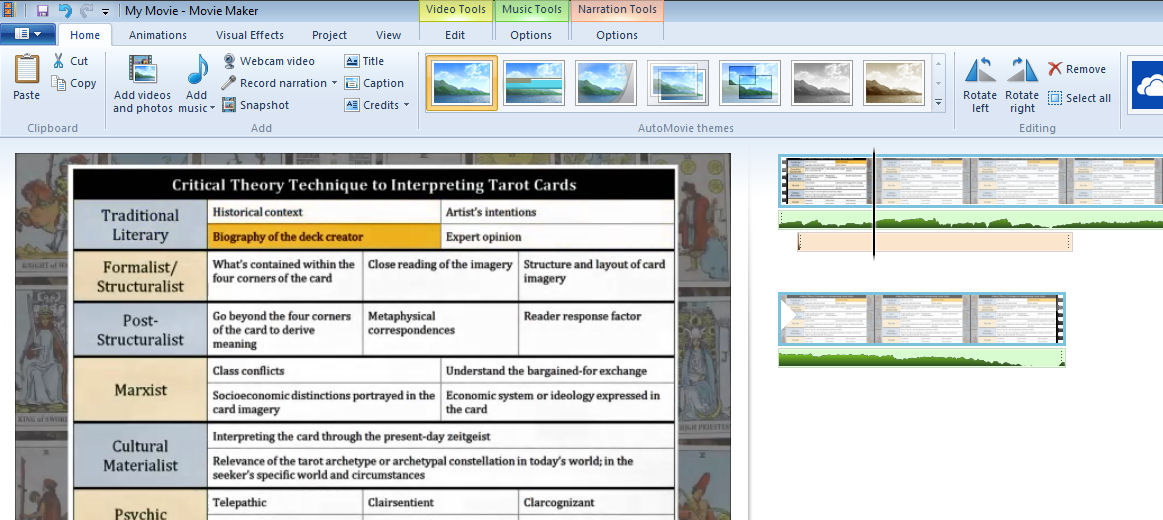
To record voiceover narration layered on top of the images that will flash across the screen, once again position that black vertical bar where you want the narration to start.
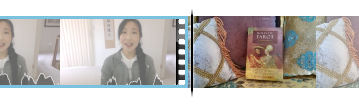
Above is a close-up of where I positioned the bar to start the narration.

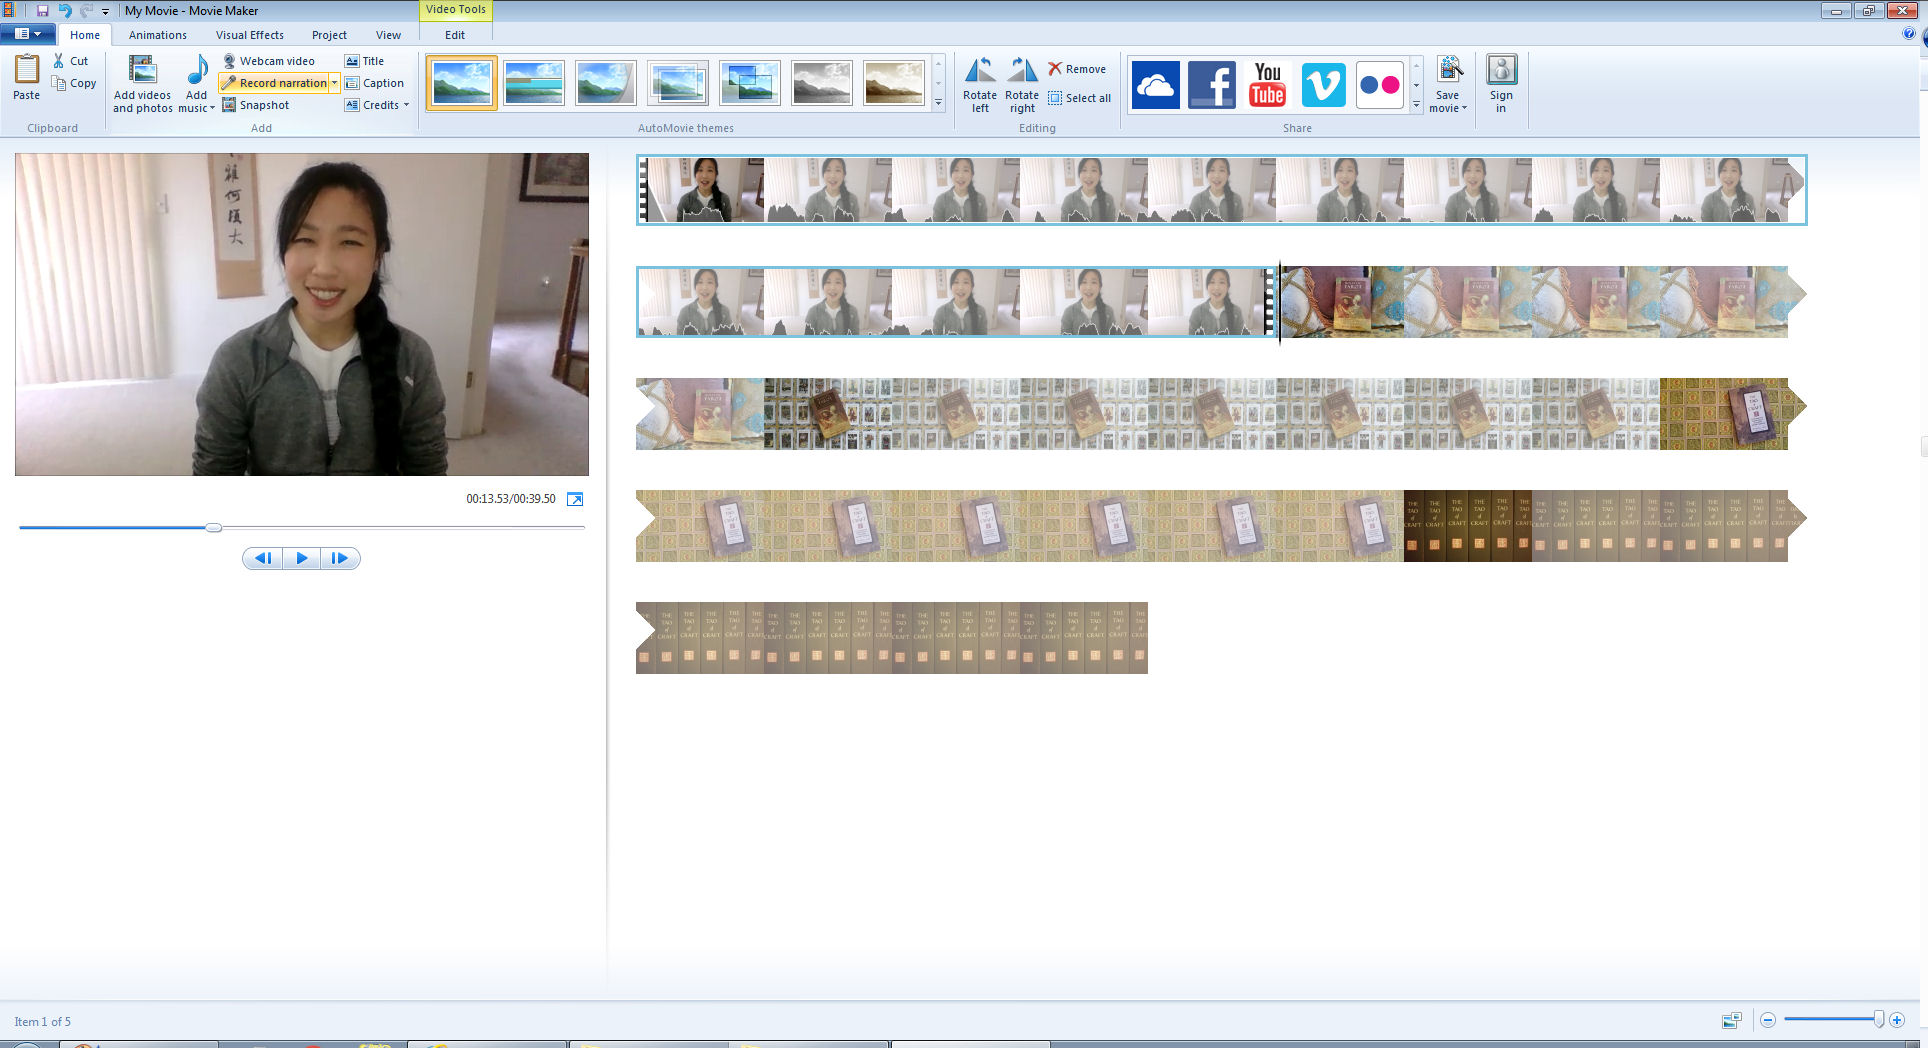
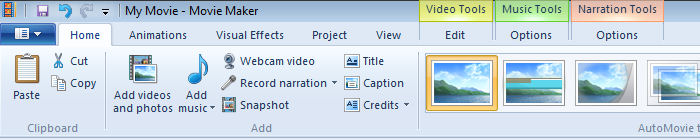
Click on the “Home” tab, then click on the option “Record narration.” You’ll see it selected in the screen shot above. Presumably, you’ve got your microphone connected and in front of you, because you’re about to talk into it and record.

After you click on “Record narration,” the above will show up. Hit the red record button and start talking.
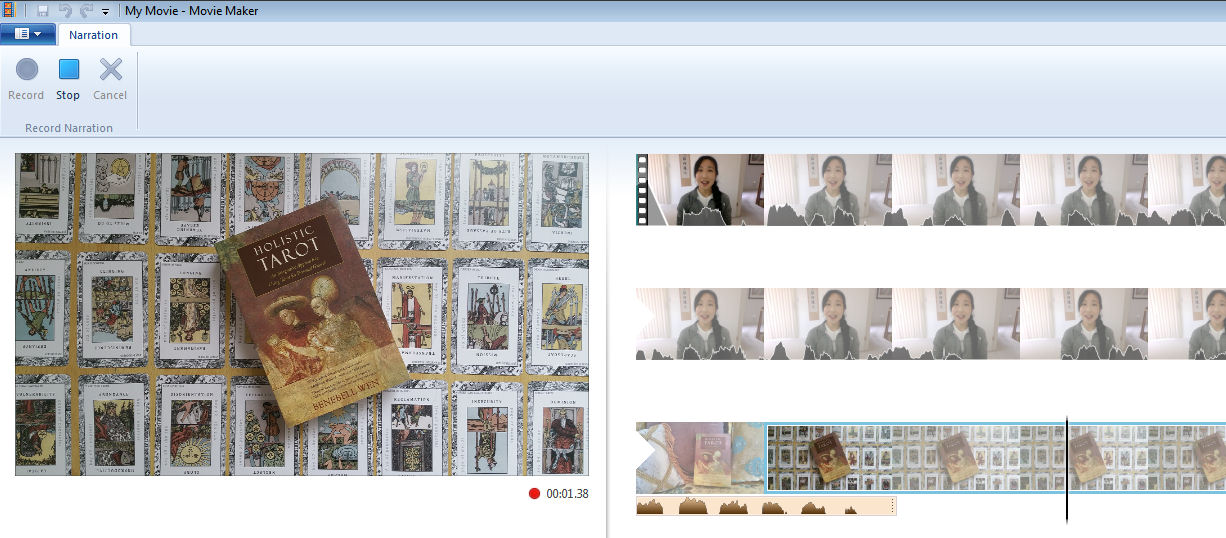
When you’re done with your spiel, hit the “Stop” button.
A new bar of shaded wavy lines will appear below the part of the photo footage you’ve narrated, as shown above. Here’s a close-up:

See that beige-ish bar with the shaded brown wavy things? That’s your voiceover audio. Play it to make sure it’s how you want it to look. Again, just like cropping the front and tail ends of the video clips, you also want to crop the front and tail ends of each audio clip to cut out any extraneous silence. It’s going to take a bit of trial and error to gain the experience of knowing just where to crop.
One more thing you need to know about. Let’s say you layer video, music and/or voiceover, whether it’s just two out of the three or all three. You’ll need to know how to balance out the audio.
Note how once you’ve got two or more of those three, highlighted tabs appear at the top of your screen. One says “Video Tools,” one is “Music Tools,” and the third is “Narration Tools.”
Click into any one of those tabs to manage the volume. So, for example, maybe you just want the video for its footage, so audio for video should actually be on mute. You’ll want to drag the tab for “Video volume” all the way to mute, as you see above.
Then click in to any of those three tabs to adjust the sound. Maybe you want the music to be way soft, just barely noticeable in the background, whereas the voiceover narration should be the loudest. Play around with the volume on all three options to get just the right audio balance.
Otherwise, what should be just background music might overpower the narration, or you might hear audio from the video footage you don’t want.
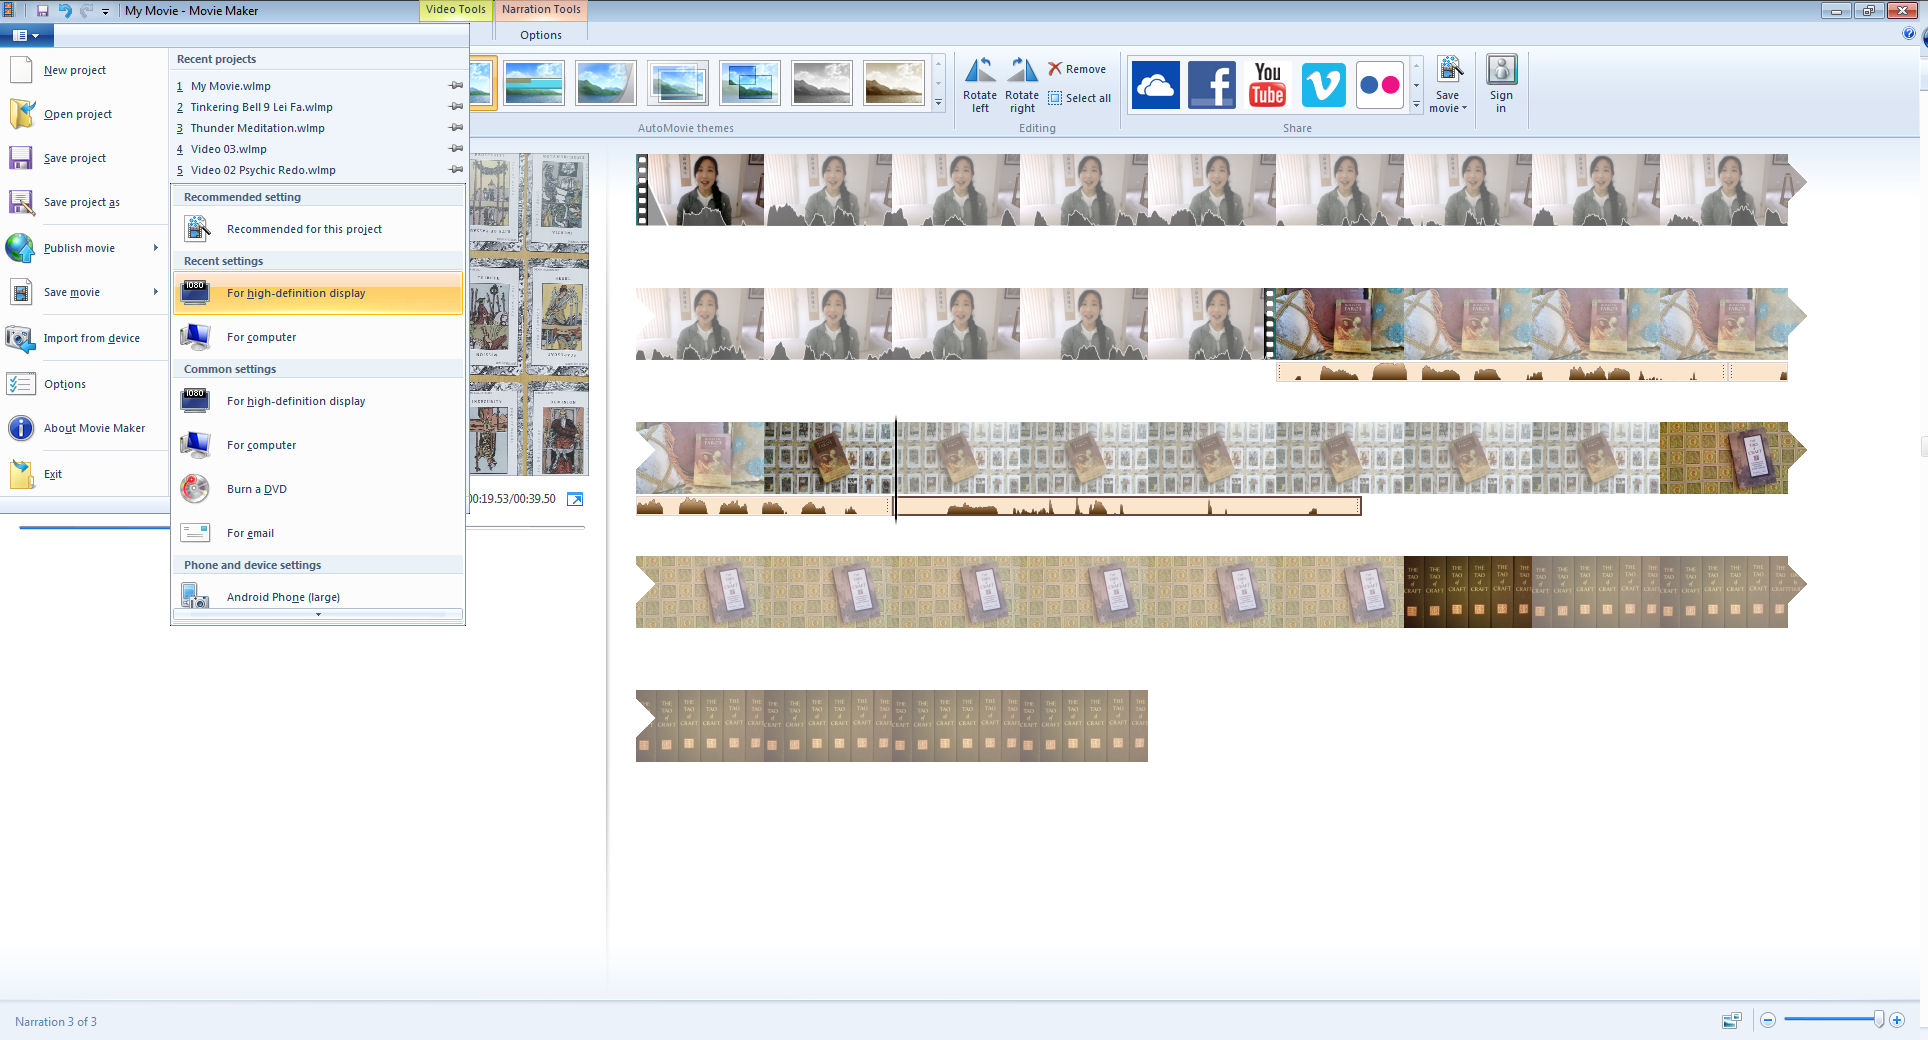
When you’re ready to produce the final video, click on that top left corner tab picture thingie (just look on the screen shot above; I dunno what it is). A menu appears. Click on “Save movie.” Another menu option appears. I click on “For high definition display.”
The program will prompt you to save the video file somewhere. Do it.
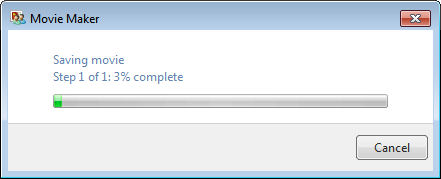
The above loading bar will appear on your screen. This may take a while, depending on the length of your video. When it’s done saving, voila! You’ve edited and produced a video with Windows MovieMaker! Easy peasy, right?
Editing and producing your YouTube videos in MovieMaker means it can be multi-media. You can throw on photographs, animate those photographs so they aren’t static on-screen, and then do voice-over narration. Or you can run video footage, mute that footage, then layer voice-over narration, or even music. You can double-layer music and voiceover narration. You can link different video clips with cool transition effects. If you’re on a PC, I think MovieMaker is worth your while to get a handle on.

Pingback: Quick Tutorial: YouTube Video Making Tips I’ve Learned – benebell wen
Pingback: My 2018 Year in Review – benebell wen