
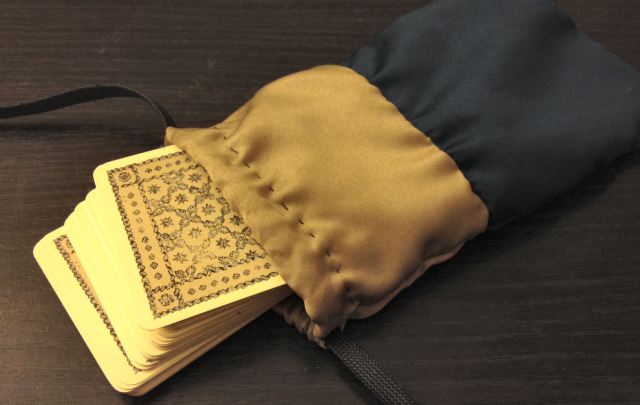
Now my sewing “skills” leave a lot to be desired, for sure, but it means something to me to use tarot bags I’ve made myself. I hand-stitched these without a sewing machine and during that time I spent sewing my tarot bag, I burned sage, concentrated my intentions into the process, and I believe the end result is something special, even if it’s quite imperfect and ugly to the lay observer.

Recently I acquired the Medieval Scapini tarot deck (don’t let the name fool you; the aesthetic is medieval art but this deck was created in the 80s) and decided I really wanted to become fluent in reading with this particular deck, so I promoted it temporarily to my primary reading deck du jour. However, that didn’t mean I was ready to displace my normal reading decks from their pretty little bags, and the number of pretty little bags I have are limited. I decided to make a bag just for the Scapini.
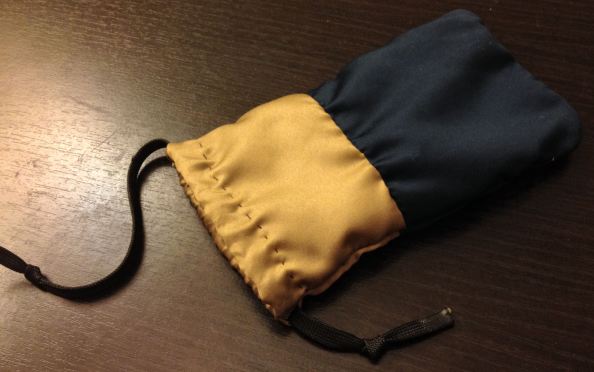
I didn’t have any nice fabric at home, but I did have a bunch of microfiber glass wipes. Don’t ask. Long story. I’m near-sighted (horribly so) and bulk ordered glass wipes for my glasses because I thought I was saving money. Anyway. Glass wipes. Great quality for making a tarot bag with, but each piece was definitely too small. I had to sew them together, which ended up having a nice duotone effect. I might just do this on purpose next time.
These are simple to make. I promise. We’ll be sewing these by hand, so you don’t even need to know how to use one of those damn sewing contraptions. Needle and thread will suffice. It’d be ideal to match the thread color to your fabric color or choose a complementary color, but if you’re scrappy like me, that’s just a luxury. I scrounged for old spools of thread and used whatever I had around the house.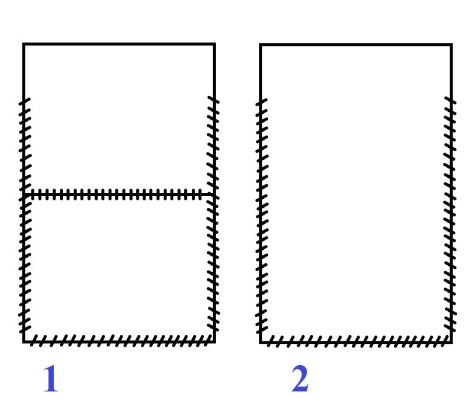
The above Diagram 1 shows what I had to do since I was sewing two pieces together for each side of the bag (four separate pieces total). If you’re using one fabric only, then each side of your bag pattern will look like Diagram 2. Layer up if you want an interior lining for your bag. I did.
Here are the stitches you should know:
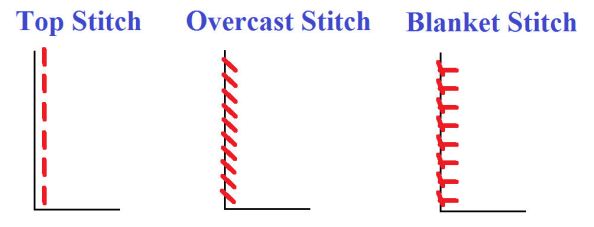
Either the overcast stitch or the blanket stitch will work for the edges of the bag. When you go to create the drawstring part (more on that later), you’ll use the top stitch.
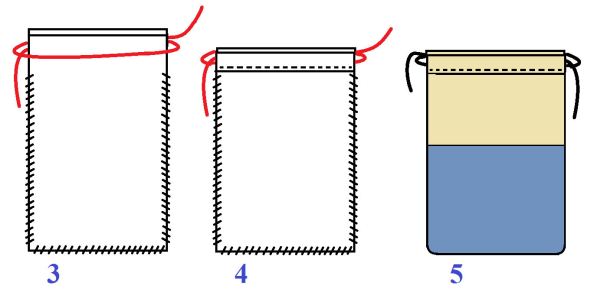
Remember you’re sewing these inside out first. Diagram 3 above shows what it should look like after you’ve stitched together 3 sides of the bag with either the overcast stitch or the blanket stitch. The red string represents the chord or ribbon you’ll be using. I used an old black shoelace I found. I snipped off the gross plastic edges and then dipped the edges in melted wax to seal them. (if you’re really going to make a whole ritual out of this, dip in purple wax for intuitive support, white for spirituality and clairvoyance, or black for power; and while you’re at it, do it during a full moon). Be sure to wrap the cord around the top two pieces as illustrated.
Diagram 4 shows the top flaps folded down. Stitch along that edge to close the loop. Be careful not to sew the two flaps together, or else you’ll have sewn your tarot bag shut. Diagram 5 shows the final product. Once you reverse it, gently straighten out the edges. They’ll still be slightly curved, however.
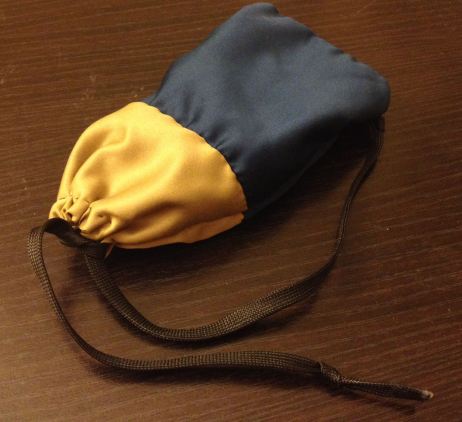
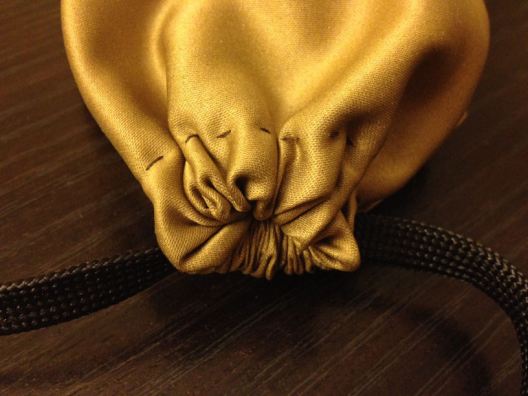
I also tie a knot on the ends of each cord. Now you have a drawstring tarot bag. Below you can see up close just how imperfect my stitches are. Well I didn’t say I was going to try and sell these. They’re special to me and that’s what matters.
If you’re a tarot enthusiast, do save your money and try making a tarot bag or two yourself. Even by hand, the whole ordeal takes less than an hour. Use decent fabric and be sure to line the interior by doubling up on said fabric and you’ll have some durable, long-lasting drawstring bags to store your tarot cards in. My stitches are ugly, I won’t deny, but the quality amazes me. I pull and tug at these things willy nilly and they just last and last nevertheless.
